Easy Ways to Hang Small Quilts on Your Wall

Make your small quilts into art with this quick and easy way to hang a small quilt (36″ wide or less) on your wall! Many quilt patterns include a wall hanging or pillow size, or your could make one block of your favorite quilt and turn it into a “wall quilt”.

What you need:

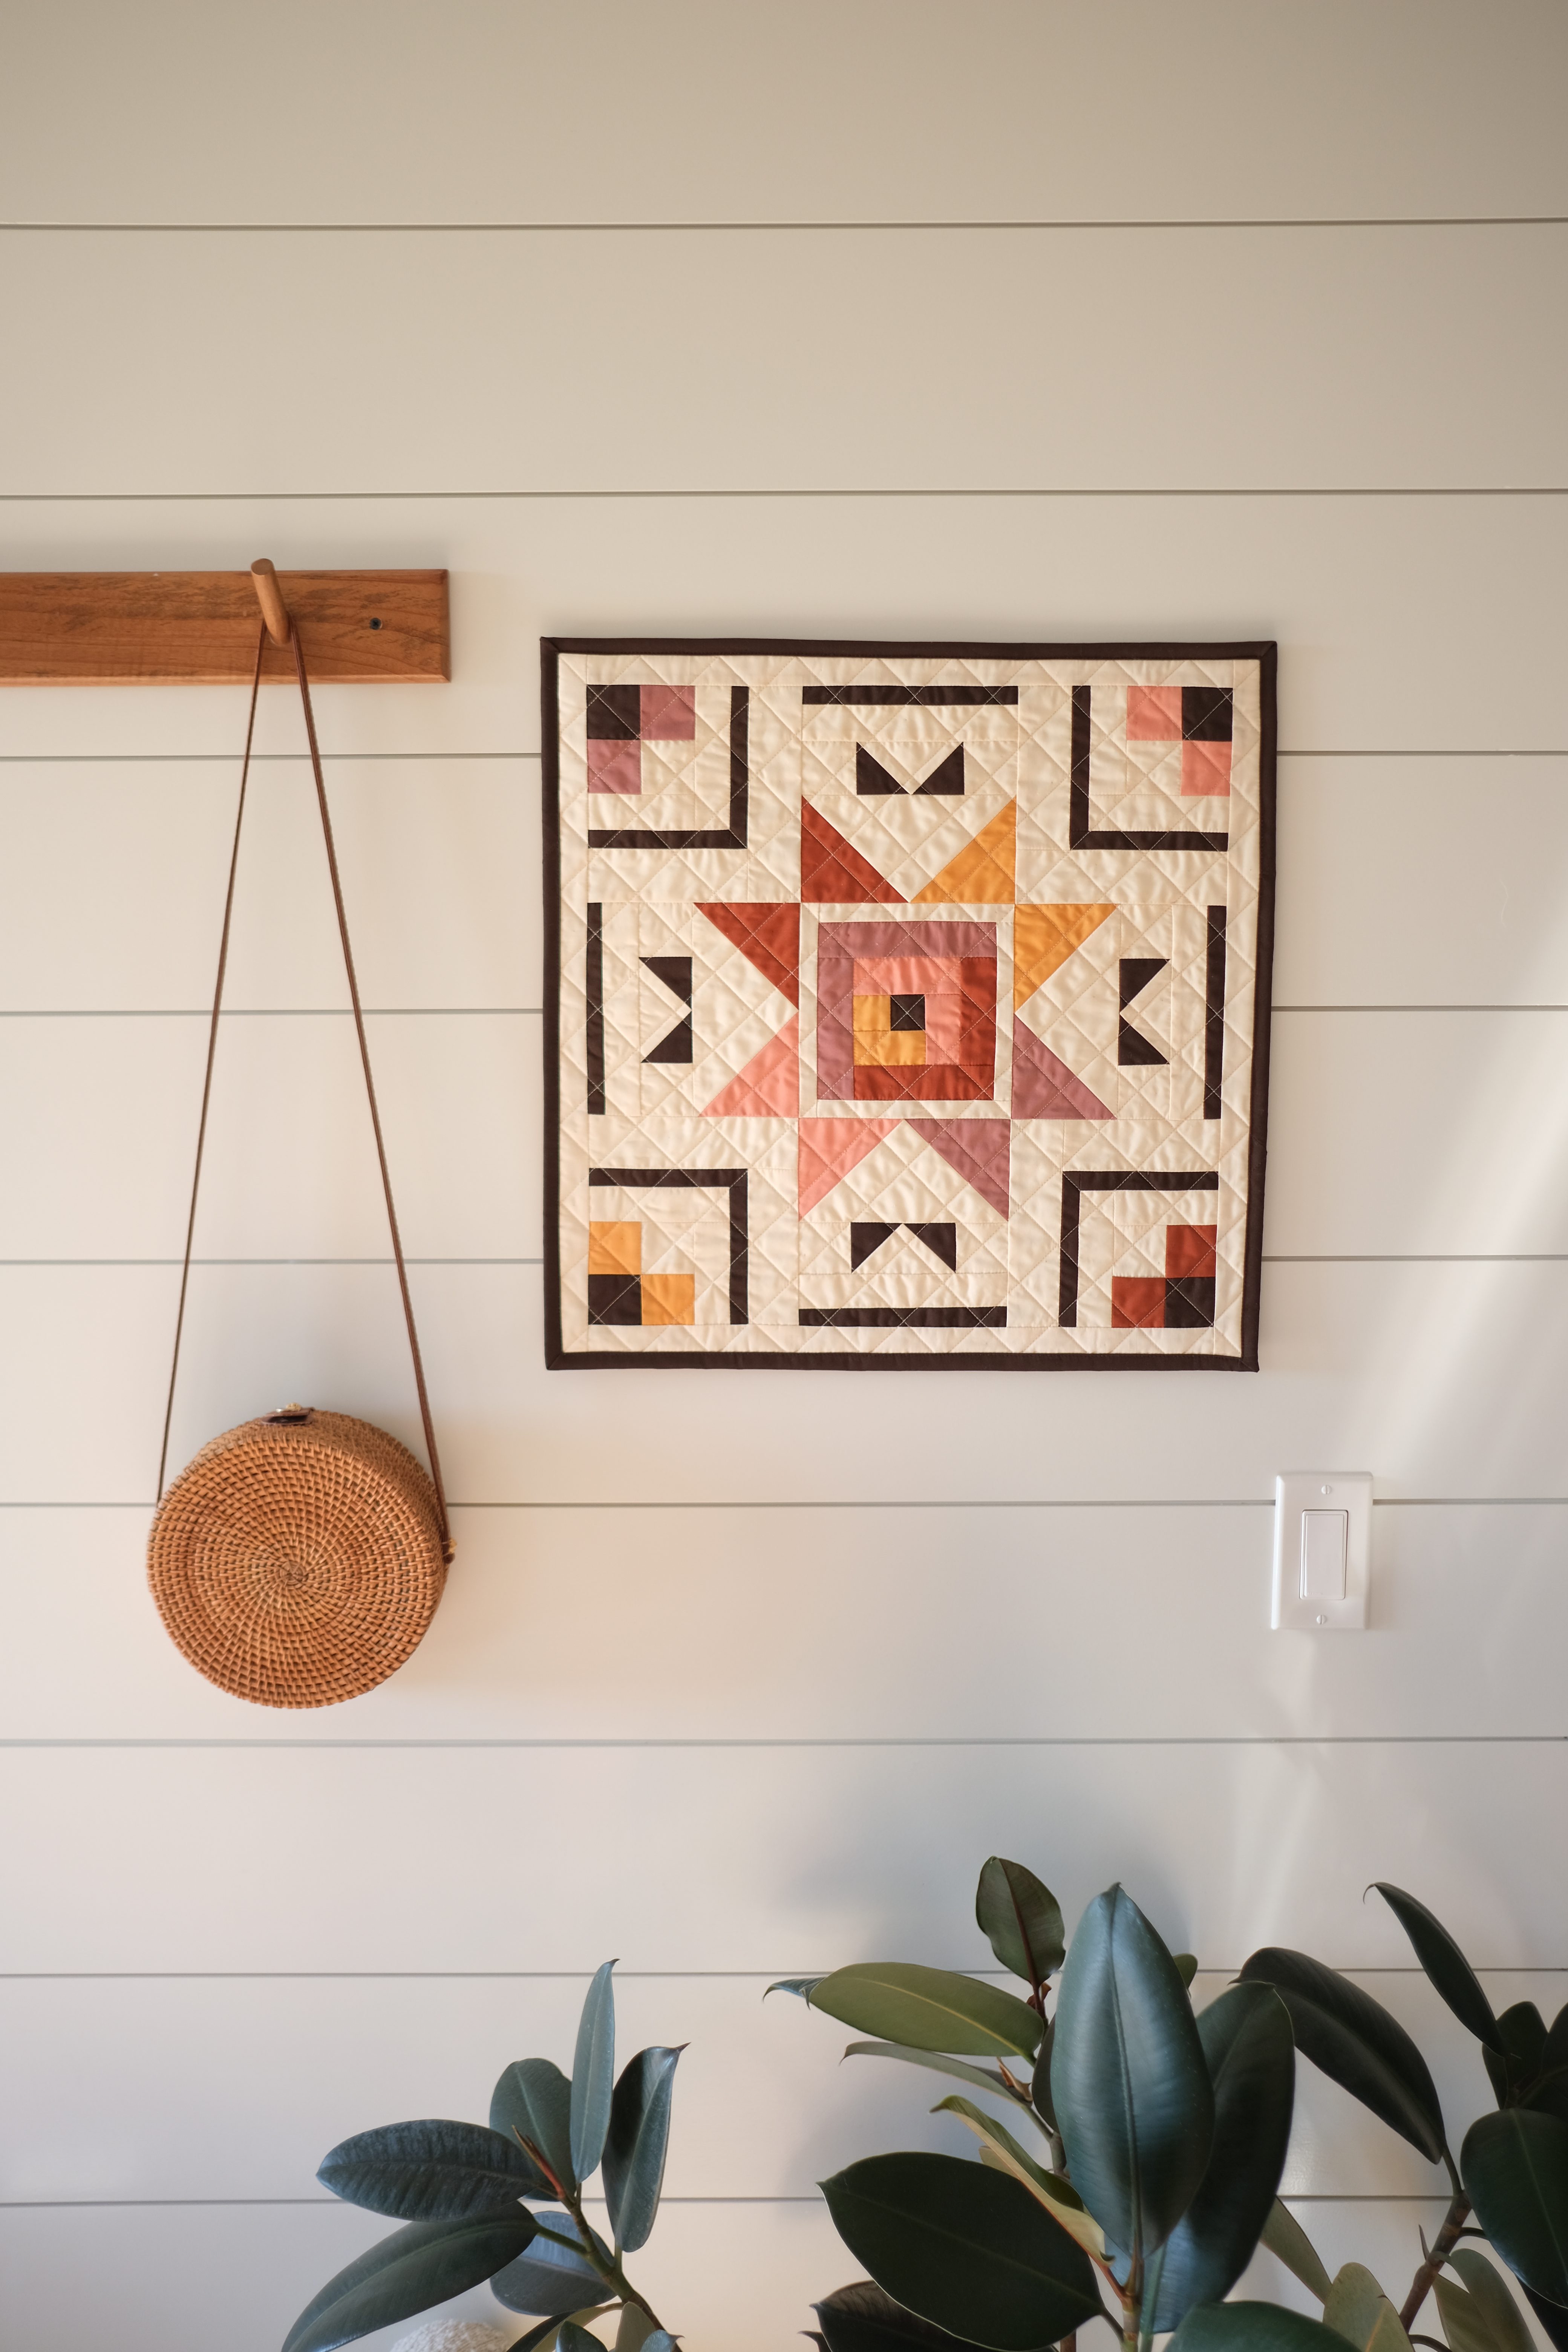
  • small quilt (36″ wide or less) that has been pieced and quilted but NOT bound (I’m using my Sunset Hike quilt in the wall hanging size.)
  • binding
  • (2) 5″ x 5″ pieces of fabric (any color, you will not see this from the front)
  • (1) wooden yard stick (I buy these at my local hardware store for a couple dollars, but you can also get a 12 pack on Amazon)
  • Command brand picture hanging strips (find those here or at your local Hobby Lobby, hardware store, etc.)

Other basic sewing items needed: sewing machine, iron, sewing clips or pins, thread, needles, scissors, etc. You will also need a way to cut your yard stick to the correct length.

A small quilt with a geometric design featuring various colors, laid flat on a wooden surface. Beside it are two orange fabric squares, a white corner pocket attachment, and a roll of dark fabric binding, along with a measuring tape.
I am using my wall hanging size Sunset Hike quilt! This pattern is available in my shop.
  1. Fold each of the 5″ x 5″ fabric pieces in half diagonally and press along the crease. These are now your “corner pockets”.
A person folding a yellow fabric square diagonally with their hand in view, on a textured gray surface.
An iron pressing a yellow square fabric piece, with a corner folded down, on a gray surface.
Two folded yellow fabric triangles on a gray felt surface.

2. Place the corner pockets on each of the back of the top two corners of the quilt. Align the raw edges of the corner pockets with the raw edges of the quilt corners. Clip or pin in place. (This is where the stick will tuck in to hold the quilt.)

A close-up of a small quilt with a floral pattern, showcasing a hand folding over a contrasting orange fabric corner.
Close-up of a quilt featuring a floral pattern with a yellow corner fabric, showing the neatly pieced and quilted texture.
Close-up of a quilt corner with a yellow fabric and colorful sewing clips holding it in place.
I love using my sewing clips for this!
Close-up of a small quilt with pressed corner pockets and colorful sewing clips on the top corners.

3. Bind your quilt as usual, just be sure to sandwich the corner pockets between your binding and your quilt as you sew.

Close-up of a sewing machine needle stitching binding onto a quilt corner, with fabric clips holding the fabrics in place.
Close-up of a sewing machine stitching the binding onto a yellow and white floral quilt.
I like to sew the binding first to the back and then finish by sewing the binding down to the front. You can do it any way you like.
Close-up of a sewing machine stitching the binding onto a small quilt, showing quilted fabric and clips holding the binding in place.
Close-up view of a small quilt featuring a floral pattern with corner pockets folded for hanging.
Close-up of a small quilt corner featuring a floral pattern and a yellow fabric with diagonal stitching.
Your corners will look like this.

4. Measure your yard stick from the inside of the seam line of the pocket to the other inside seam line of the pocket. Cut your yardstick to this measurement. It should fit snuggly inside the pockets without pulling on the quilt. (My husband uses a small electric saw to cut my yardsticks, but you can use any saw and most hardware stores will cut sticks and wood for you for free if you purchase them there.)

A small quilt with a floral pattern, measuring 36 inches wide, displayed with a measuring yardstick on top, indicating its width.
Close-up of a small quilt with a floral pattern and a yardstick measuring approximately 19 inches at the top.
Close-up of a quilt with floral pattern and brown binding, showcasing a wooden yardstick placed on top for measurement.

5. Slide the yard stick into the pockets.

A hand holding a wooden yardstick against the corner of a yellow floral quilt, showing the measurement along the edge.
A close-up view of a small quilt with a floral pattern, featuring corner pockets and a wooden yard stick positioned at the top for hanging.

6. Make pairs of command strips. I usually use 2 pairs, 4 strips total. Stick the “velcro” sides of the pairs together. Take the plastic protective film off one side of each pair and stick onto the yard stick.

Two Command brand picture hanging strips placed on a floral quilted fabric, showcasing a flower pattern in orange and white.
Close-up of a hand holding a Command brand picture hanging strip above a floral quilted fabric.
I stick them together with the pull tabs at opposite ends.
A close-up image showing a hand holding a yardstick lined up against the edge of a small quilt with a floral pattern, indicating the position of a Command strip.
Top view of a small quilt in warm orange fabric with white floral patterns, showcasing a wooden yardstick and corner pockets for hanging.

7. Take the plastic, protective film off the strips that are not stuck to the yard stick. Pick up the quilt and press against the wall where you would like to display it while applying pressure to where the Command strips are at.

A hand positioned on the edge of a colorful quilt featuring various geometric patterns and colors, with a quilted texture.

There you go, your quilt is now up on the wall and on display! What a wonderful way to bring design and texture into your home.

I’ve gotten a lot of questions about how to take your quilt off of the wall when you’re done displaying it and if the Command strips ruin the wall when you take them down.

To take it down, I first slip the quilt off of the yardstick. Then I pull on the yardstick carefully to separate the command strips from each other. From there you simply pull the tabs on the Command strips as shown in the directions on the box and they come off the wall very easily. I use these to hang quilts and other frames in my house and they have never left a mark!

A wooden yardstick mounted on a white wall.
A hand holding a wooden yardstick marked with measurements, positioned near two Command brand picture hanging strips on a wall.

Comments

One response to “Easy Ways to Hang Small Quilts on Your Wall”

  1. Kelle Evans Avatar
    Kelle Evans

    Brilliant!

Leave a Reply to Kelle EvansCancel reply

Discover more from In the Light Quilts - Blog

Subscribe now to keep reading and get access to the full archive.

Continue reading